Before You Begin
-
Call Recording: For voice conversations, AI results are only generated if call recording is enabled.
-
AI Provider Account: You’ll need an active account with an AI provider (e.g., ChatGPT, Gemini, or Oracle AI) and an API key.
Step 1 – Access AI Profile Settings
-
Sign in to your Contivio Admin Portal.
-
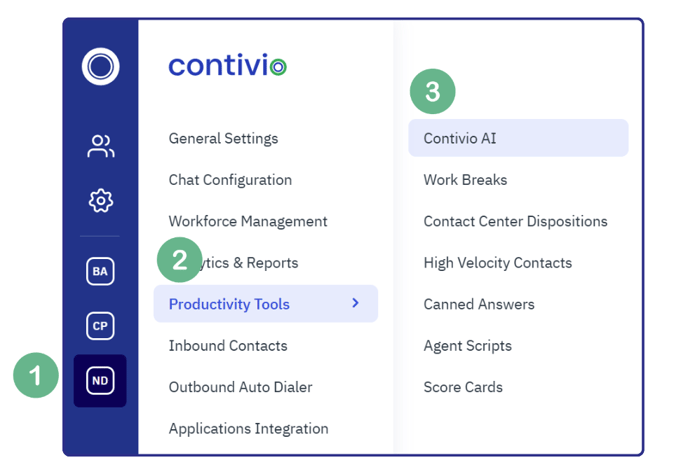
Navigate to:
Productivity Tools → Contivio AI. -
Click New to create a profile.
Step 2 – Choose Profile Scope
-
Post-Call Analysis – Runs after a conversation ends. Generates a transcript, summary, sentiment score, dispositions, follow-up actions, positives/negatives, insights, and scorecards.
-
Pre-Call Discovery – Summarizes a customer’s recent history before you answer. Requires selecting how many past interactions to analyze. (Currently only available with Oracle AI)

Step 3 – Connect to Your AI Provider
-
In the Provider dropdown, select your AI service (e.g., ChatGPT, Gemini).
-
In your AI provider account, generate an API key.
-
For ChatGPT, go to your account settings and create a new API key.
-
Copy the key.
-
-
Paste the key into the API Key field in Contivio.
-
Click Done.

Step 4 – Select AI Outputs
Each output is a separate query to your AI engine.
Enable only the fields you need to reduce API usage:
-
Call Summary – A brief description of the conversation.
-
Customer Satisfaction Level – AI-generated rating based on transcript.
- Insights – Keyword/phrase triggers you define (set up separately).
-
Proposed Disposition – Suggested category for the call.
-
Positives & Negatives – Highlights positive and negative moments.
-
Follow-Up Actions – AI-recommended next steps.
-
Scorecard – AI-answered QA questions you define (set up separately).

Cost Note: Contivio does not charge for AI queries. Usage counts against your AI provider’s credits. Disabling unused outputs will conserve credits.
Step 5 – Apply the Profile
-
Default Profile – Assign as the default for all queues and agents.

-
Queue-Specific – Assign to a specific queue for specialized analysis.

-
1. Navigate to Call Center
-
2. Click 'Inbound Contacts'
-
3. Open 'Queues'
-
4. Click pencil/edit icon on desiterd queue

-
5. Open AI&CRM tab, and select desired AI profile

Step 6 – Test and Review
-
Make a few test calls or chats.
-
Open Contact Center Search to view AI results.
-
Adjust outputs, scorecards, and insights based on your review.

Best Practices
-
Start Small: Launch with one profile, then expand to specialized profiles as needed.
-
Validate AI Accuracy: Compare AI outputs against manual reviews before automating any actions.
-
Monitor Credit Usage: If credits are depleting quickly, turn off less critical outputs.