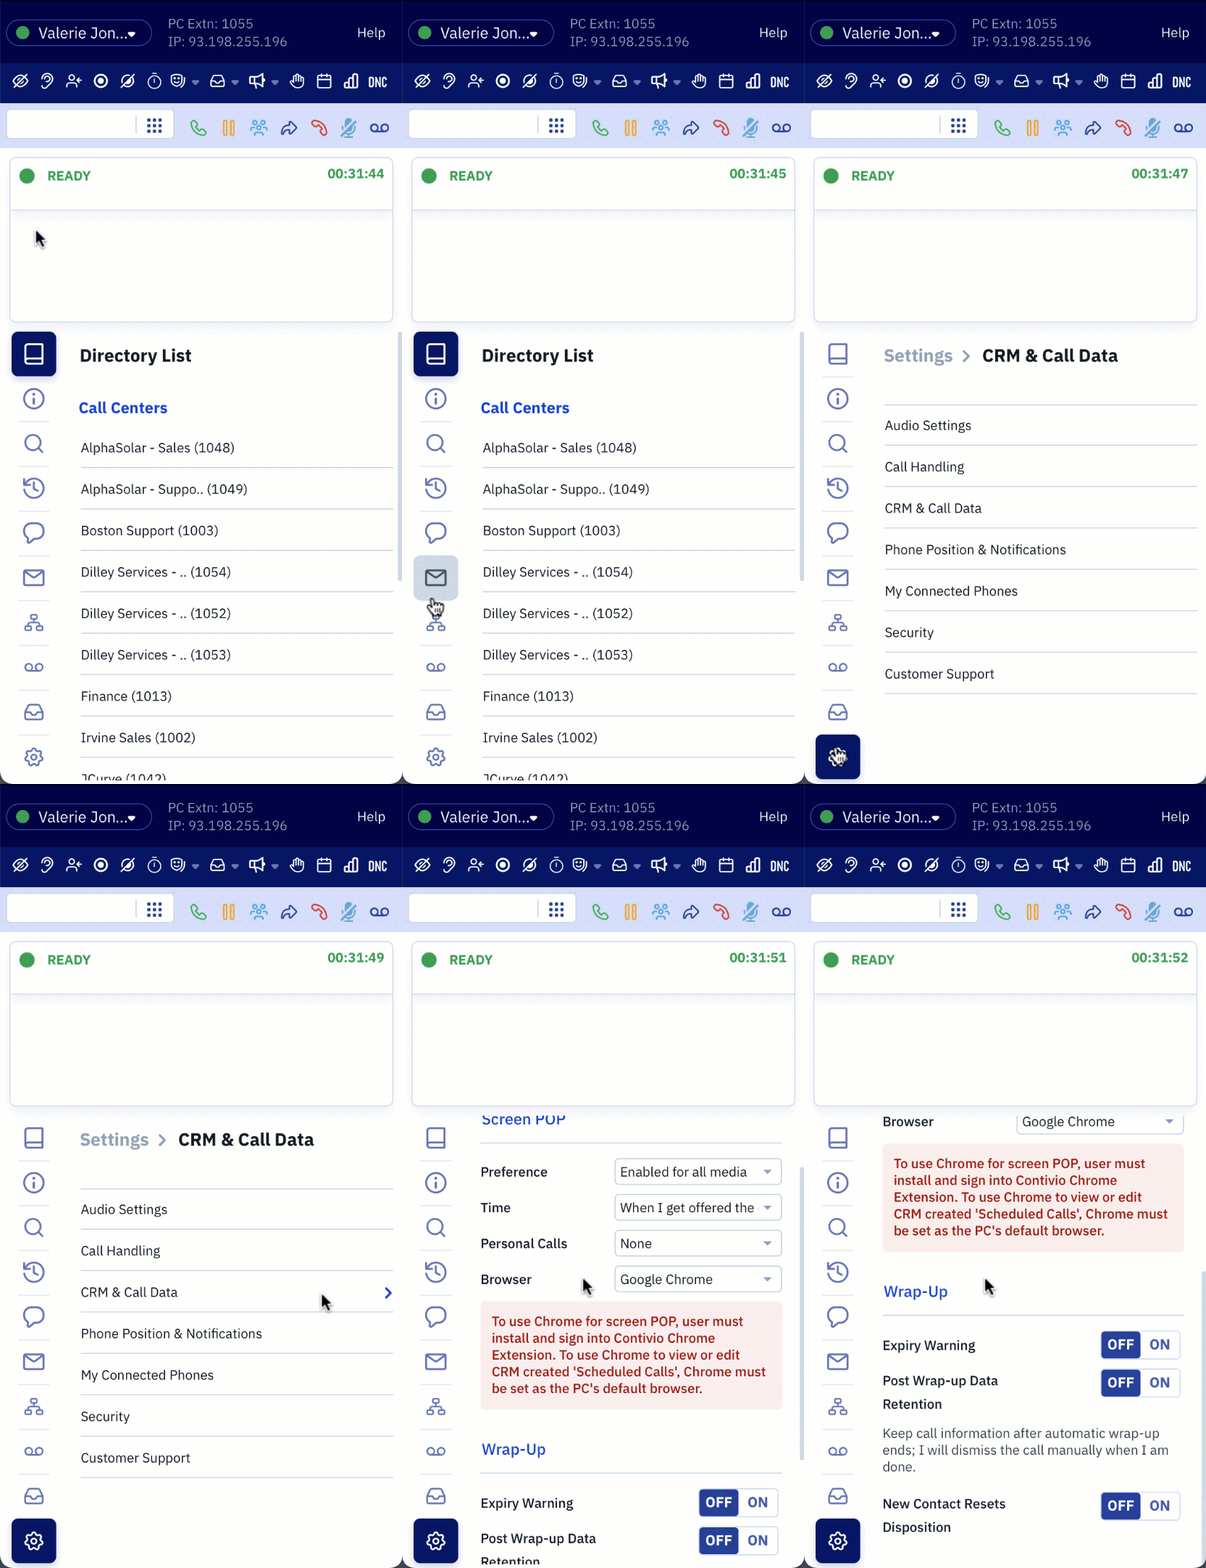
Upon logging in to Contivio for the first time, there are a couple of settings that need to be configured/verified in order to optimize your Contivio softphone performance.
Audio Settings
Dictate how Contivio processes your audio for voice calls
 Click on the 'Settings' icon located on the sidebar menu.
- Click Audio Settings
- Microphone & Speaker- A user can set and manage their ‘Microphone’ and 'Speaker’ options provided they’re using the Contivio App and not an IP phone.
- Ringing- Users can decide which device will play the ringing tone when receiving a call. If 'Use Selected Speaker' is chosen, the ringer will play on the device selected in the 'Speaker' dropdown list. Otherwise, users can select another device from the dropdown list. For instance, they may want the ringer to play on their computer speakers, so they're able to hear incoming media when they're away from their computer.
- Headset White Noise- A setting used primarily for wireless and Bluetooth headsets, to prevent them from going into sleep mode.
- Ring Tone- Select the ring tone for incoming media.
Note: Verify that you're able to hear calls in your headset and that you can also hear the party on the other line.
Updating CRM & Call Data
CRM & Call Data is a collection of user options to manage the interactions between the Contivio Apps and your host CRM.
There are two settings to configure:
 Screen Pop – set the behavior of how media will automatically trigger your CRM to open by:
- Preference – set the media activation trigger to ‘Disabled’, ‘Enabled for all media’, ‘Enabled for voice only’, or ‘Enabled for message contact only’ (i.e., SMS, voicemail, chat, and email).
- Time – set in motion the ‘Screen Pop’ to ‘When offered the contact’ or ‘After accepting the contact’. This will determine if the screen pop displays during a call offer, or after a call offer is accepted.
- Personal Calls – choose to activate a pre-configured ‘Screen Pop’ scenario for non-business-related calls.
- Browser – set your Internet navigation software preference. Users should select "Google Chrome"
Wrap-Up - set the behavior of your wrap-up period:
- Expiry Warning - a notification will display 10 seconds before the wrap-up period is due to expire.
- Post-Wrap-up Data Retention - decide to keep the Call Information (e.g., media ‘Dispositions’ and call notes) for further updating after the communication has ended and the wrap-up period has expired. Call Information can then only be pushed to the CRM and dismissed manually by selecting the ‘Dismiss Contact Data’ icon.
- New Contact Resets Disposition - The disposition field will be cleared when a new contact is received.
Next: Setting Up Personal Voicemail