Yealink Factory Reset
Yealink Factory Reset with Default Password
- On the phone, press the Menu/OK key
- Use the phone's directional pad to select and enter Advanced settings. Note: You will be prompted to enter the admin password (default is admin)
- Use the phone's directional pad to select Reset Config > Reset to Factory Settings
- You’ll see a confirmation message. Press OK
Yealink Factory Reset without Default Password
- Press and hold the 'OK' key on the face of the phone for 10 seconds.
- This will prompt you to accept or decline a factory reset. - If you accept, the unit will restore itself to factory default settings - without the need for the admin password.
Getting Yealink IP phone IP Address
|
Phone Model |
Instructions for getting the IP address |
|
Yealink T21P Yealink T33G Yealink T42S Yealink T46S Yealink T48S Yealink T43U Yealink T46U Yealink T48U Yealink T53 Yealink T53W Yealink T54W |
Press OK on the deskphone. Find the IP address on the line labeled IPv4. |
|
Yealink CP925 Yealink CP965 Yealink T57W Yealink T58 Yealink VP59 |
|
|
Yealink W52P Yealink W56P Yealink W60P Yealink W69P Yealink W76P Yealink W79P |
|
|
Yealink T58W Yealink VP59 |
|
|
Yealink CP965 Yealink CP925 |
|
Reset Phone to Factory Defaults Through the Phone's Web GUI
- The device web interface (GUI) allows you to make changes to the phone's settings via a web browser on your computer, which can often be more convenient than on the phone screen itself. You must ensure that:
- To obtain the phone’s IP address, press the OK button on the phone or press Menu > Status.
- Enter the IP address into the address bar of your web browser, then press Enter.
- Log in to the desktop phone’s web interface. The default values are:
- Username: admin
- Password: admin
- Navigate to Settings > Upgrade > Reset to Factory Settings.
- Click the Reset Now or Reset to the Factory Settings button.
Provision Phone into Production
Manually Provision Phone into Production
- In a web browser on a computer on the same network as the phone, browse to the phone's IP address (for example https://192.168.1.100)
- Log in as admin and enter password admin.
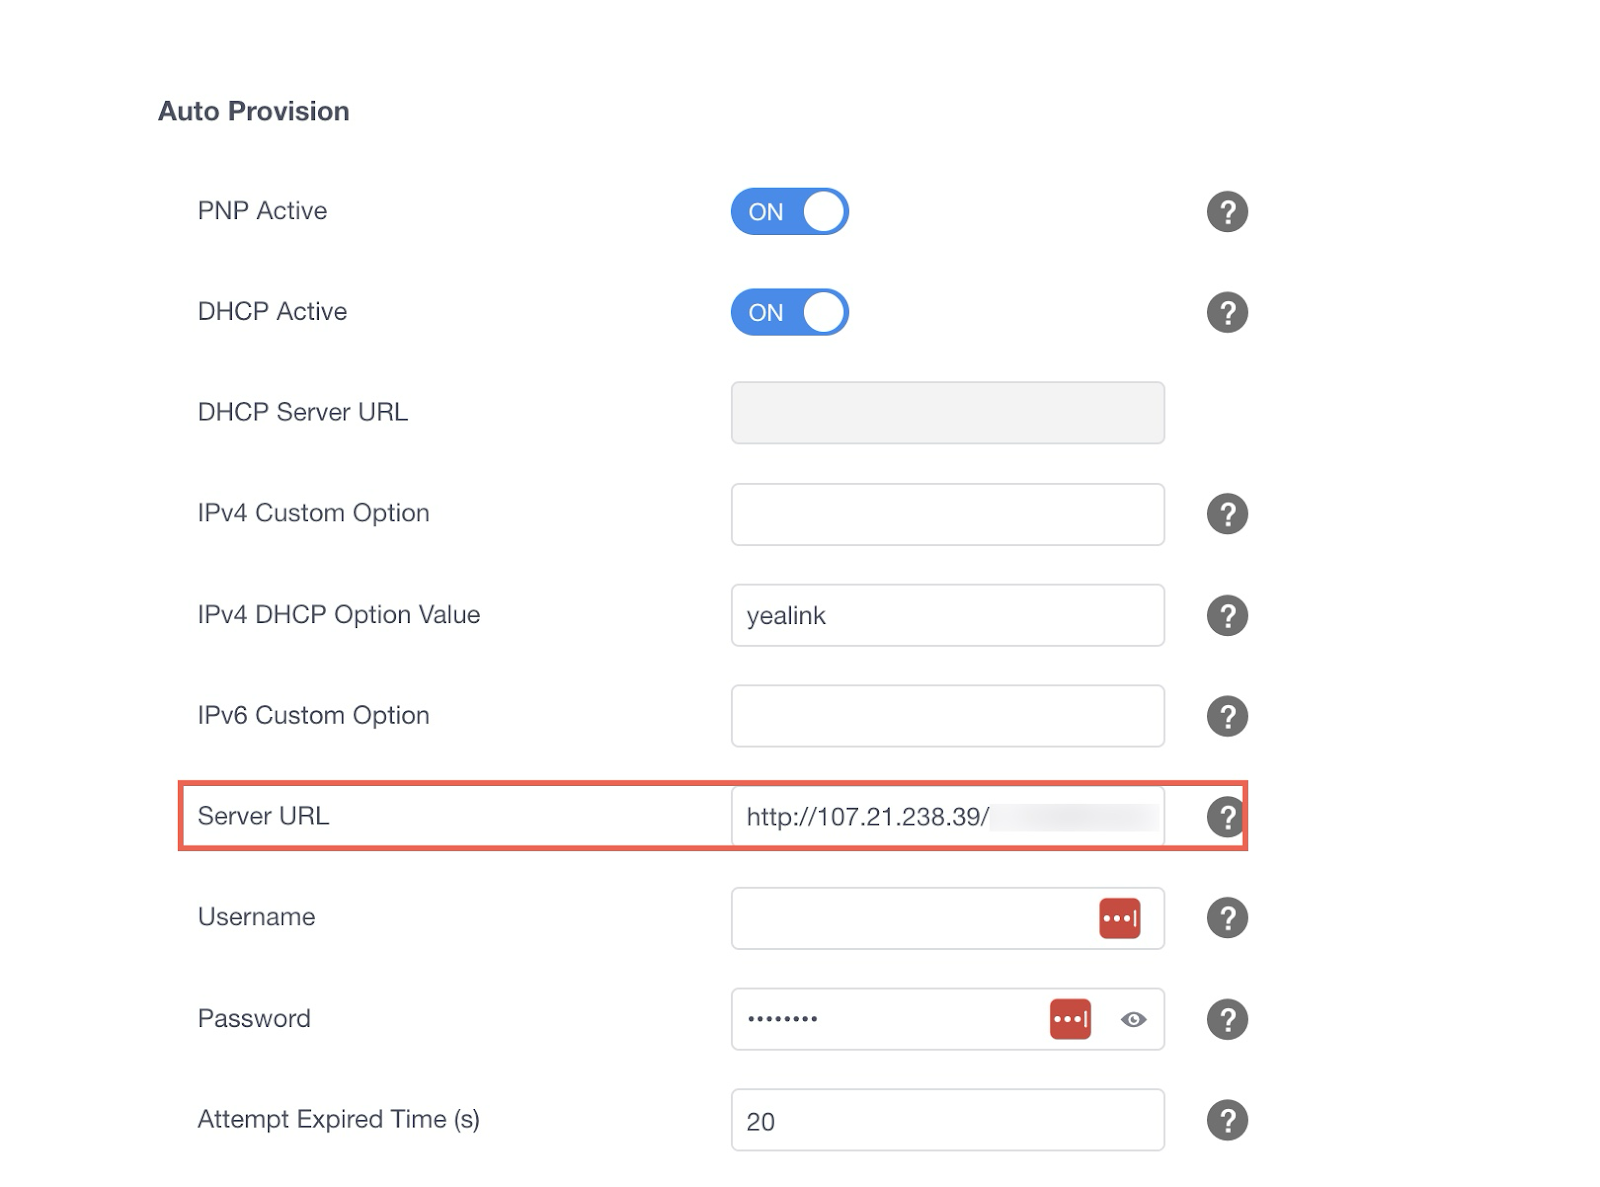
- Navigate to Settings > Auto Provision.
- Input the Contivio-provided provisioning URL into the Server URL field (the URL will start with http://107.21.238.39/XXX)
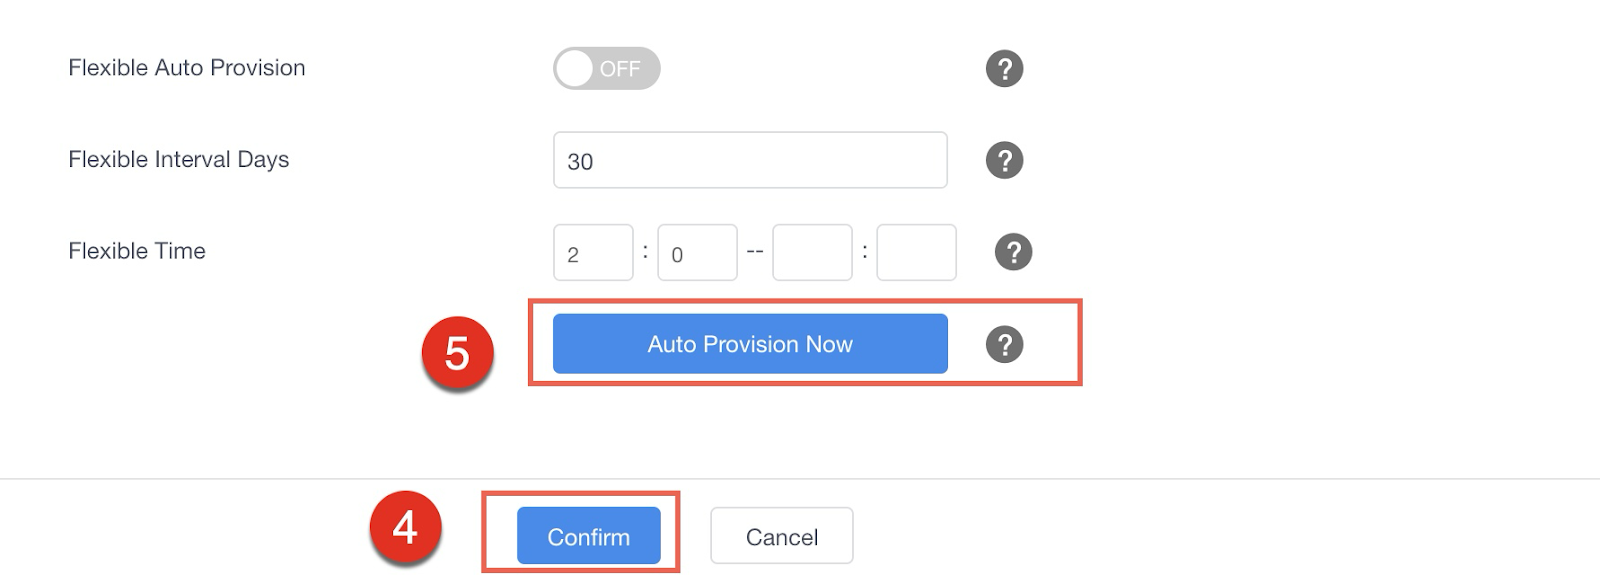
- At the bottom of the page, click on the Confirm button
- Click on Auto Provision Now
AutoProvision Phone into Production
- Configure your DHCP server option 66 and option 150 to point to the URL: http://107.21.238.39/XXX_XXXXXXXXXXXXXXXXXXXXXXXXXXXXXXXX
- After configuring the DHCP option, plug the IP phones into the network.
- Your phone will download the config, update firmware, and might reboot at least once.