Voice Connectivity options within the admin portal give visibility into active users, VoIP trunks, and dial plans.
Contivio recommends you consult with an engineer if you wish to make any telco modifications to your cell center.
This article will detail how each of the seven (7) main sections of Voice Connectivity are broken down.
Connected Phones
A list of all active devices on the account, the users assigned to them, and their IP addresses will be listed under Connected Phones.
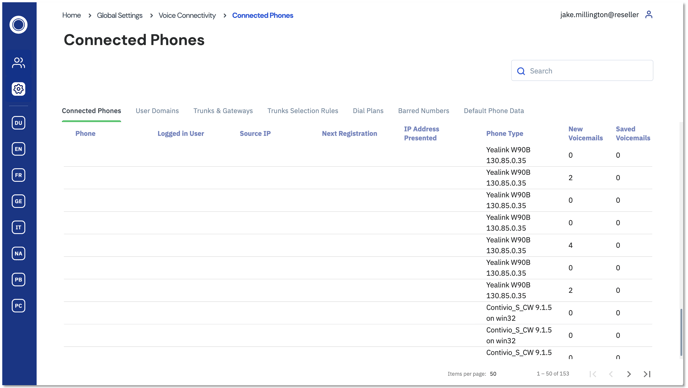 (Some of the information in the image above is blank for security purposes.)
User Domains
Create subdomains for your call center, this will reward you the ability to specify which SIP trunk is being used when dialing out.
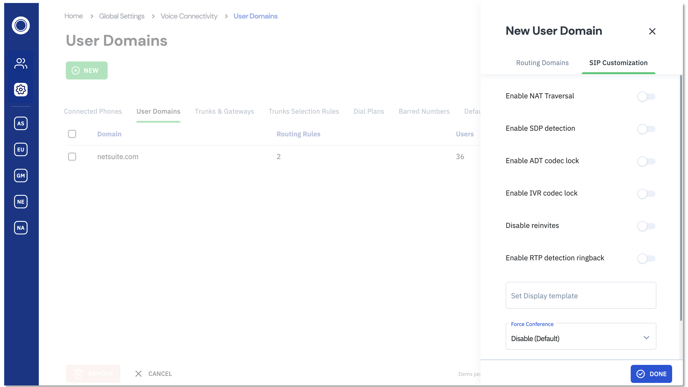
- Navigate to Global Settings > Voice Connectivity > User Domains
- Click 'New'.
- Routing Domains
- Enter a sub-domain and password.
- SIP Customization
- Configure the toggle switches and drop-down lists according to your call center needs.
- Routing Domains
- Click 'Done'.
Trunks and Gateways
A list of VoIP providers and the numbers assigned to each carrier.
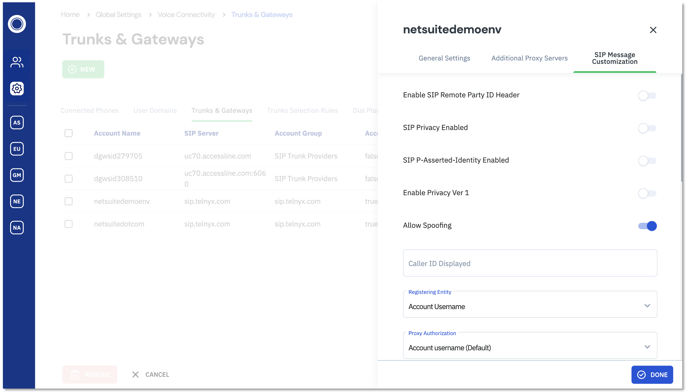
- Navigate to Global Settings > Voice Connectivity > Trunks and Gateways
- Click 'New' to set up a new trunk or click the Edit Icon
 to make changes to an existing trunk.
 - Settings are split into three (3) sections. Configure each listed below.
- General Settings:
- Sip Account Type: This setting will likely always be set to 'SIP Trunk'.
- Account DIDs: Enter phone numbers allocated for this account.
- Use Account for: Select whether this account will be used for inbound calls, outbound calls, or both inbound and outbound.
- Voice Codecs Order: The order used for the codecs, will likely be set to 'G.711ua Then G.729'.
- Account User ID: Account identifier.
- Account Group: Combine multiple SIP trunks into a single group.
- Registration Period: How frequently Contivio will register with a VoIP Provider.
- Registration Password: Unique Password.
- SIP Server: SIP server's domain.
- Outbound Proxy Server: In case of a server failure, set a proxy server domain.
- Secondary Proxy Server: In case of a server failure, set an additional proxy server domain.
- Domain/Registrar: Domain used for registering with a VoIP provider.
- Register Proxy: Proxy domain used for registering with a VoIP provider.
- Maximum Number of Inbound Calls: Number of inbound calls this trunk can handle at any given time.
- Maximum Number of Outbound Calls: Number of outbound calls this trunk can handle at any given time.
- Additional Proxy Servers:
- Additional Proxies: A list of any additional proxy servers between Contivio and a VoIP provider.
- SIP Message customization: Consult with an engineer before making any changes.
- General Settings:
Trunk Selection Rules
Set up rules that specify which SIP Trunk your domains or numbers go through when dialing out.
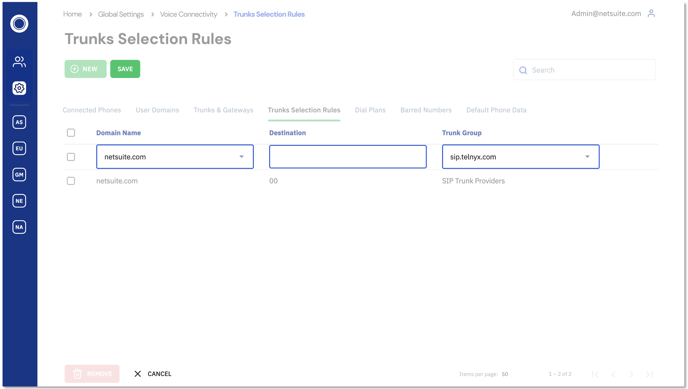
- Navigate to Global Settings > Voice Connectivity > Trunks Selection Rules
- Click 'New'.
- Select the Domain and the Trunk Group you wish to leverage.
- Click 'Save'.
Dial Plans
Within a group or range of numbers, select a specific number to dial out from.
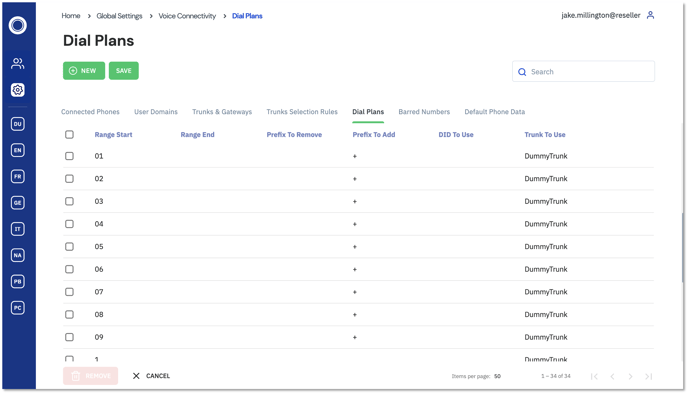
- Navigate to Global Settings > Voice Connectivity > Dial Plans
- Set a range start and range end.
- Set a prefix to remove and/or a prefix to add.
- Select a DID.
- Select a trunk to dial from.
- Click 'Save'.
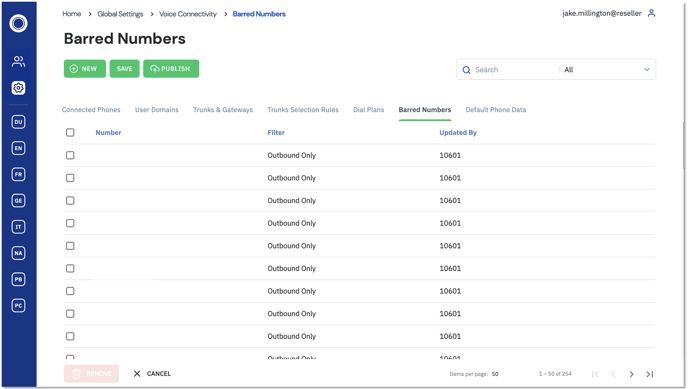
Barred Numbers
A list of numbers that have been added to the Do Not Call List in Contivio. These numbers can be prevented from dialing into your call center, and/or can be prevented from being dialed by your users. Additionally, you can see who added each number, and in which direction the traffic is barred.
-
Navigate to Global Settings > Voice Connectivity > Barred Numbers
-
Click 'New'.
-
Enter the phone number you wish to block.
-
Select the direction(s) that you'd like to block the number from.
-
Click 'Save'.
Agents can also add numbers to the Barred Numbers list, via the DNC icon in the Contivio app:
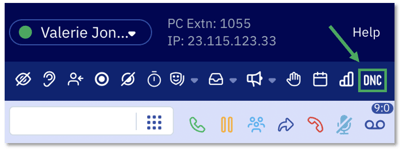
Note: Agents cannot remove numbers from the Barred Number list. Only administrators will have the capability to remove numbers.
Default Phone Data
Important data that is attached to a phone number and shared throughout the call center. (i.e., the required skill needed to handle this caller)
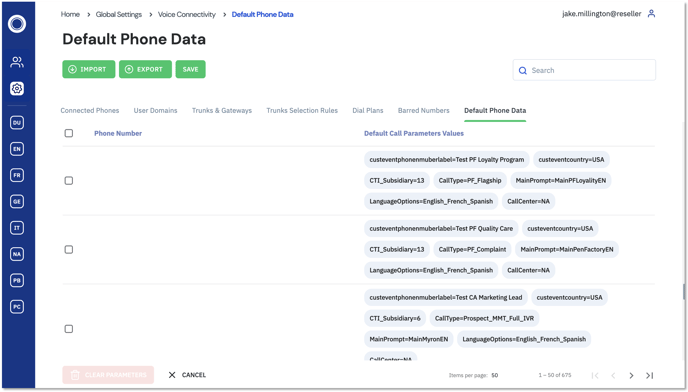
- Navigate to Global Settings > Voice Connectivity > Default Phone Data
- Click 'Import' to upload a list of phone numbers that you wish to configure.
- Click the edit icon to enter new call parameter values.
- Click 'Save'.