Please watch the video below for a brief overview of our Live Chat Solution.
Note that in order to enable chat, your contact center must be configured for it. Please contact your administrator to walk you through the initial set up before continuing.
Configuring Your Contact Center for Live Chat
Set Up Your Queues to Enable Chat
The first step to getting your Chat Tool up and running is making sure your contact center queues are configured within the administrative portal.
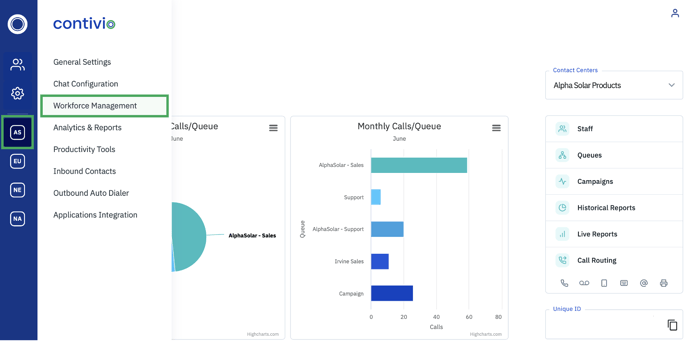
On the left-hand side of the home screen click your Call Center > Inbound Contacts > Queues OR simply click ‘Queues’ located on the right side of the admin portal home screen.
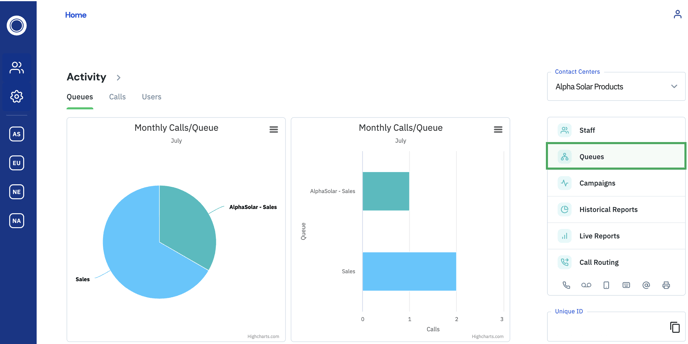
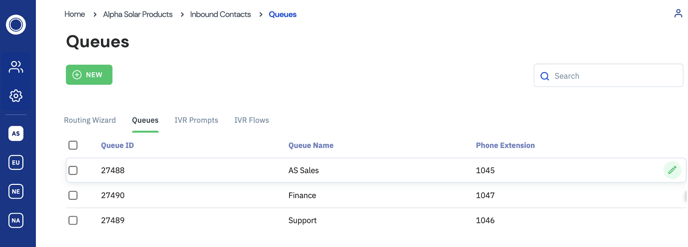
Queues
Select which queue you would like to edit by hovering and clicking on the pencil icon located on the right-hand side of your screen.
Configuring Your Chat Queue
From the list of media channels, ensure the ‘Chat’ box is checked. (Next you will configure functionality settings)
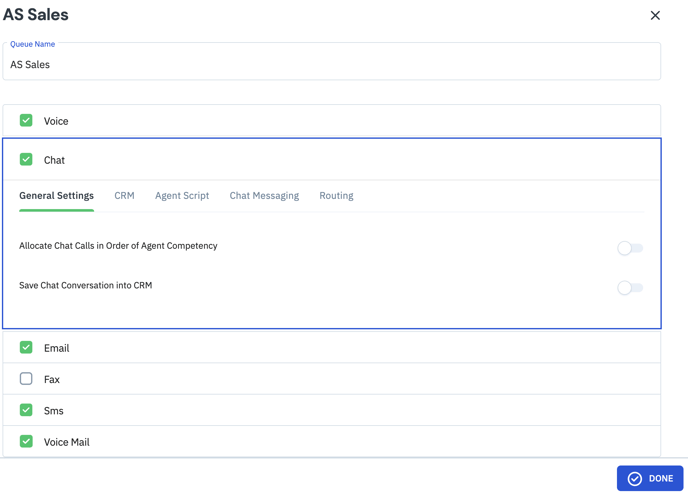
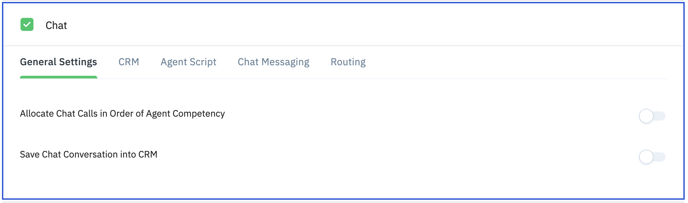
General Settings
- Allocate Chat Calls in Order of Agent Competency- Select whether to direct chats to agents in order of competency (Similar to Skills Based Routing). Simply click on the toggle switch.
- Save Chat Conversation into CRM- Choose whether to automatically save chats within your CRM. Simply click on the toggle switch.
CRM
Configure functionality settings in relation to your Chat tool and CRM.
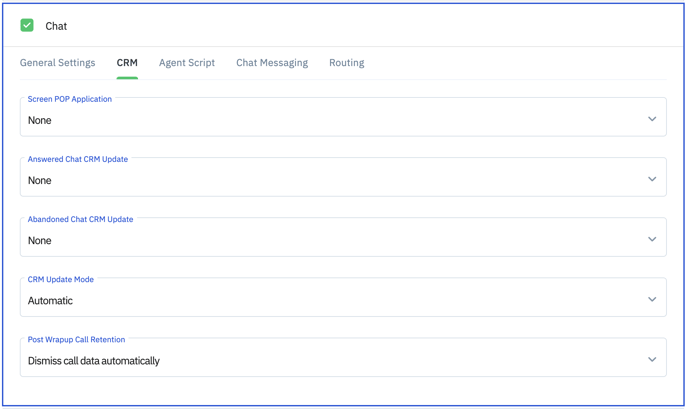
- Screen Pop Application- Select what record type populates in your CRM when a new chat is received. (i.e., Sales Order, Case Record, New Customer Record)
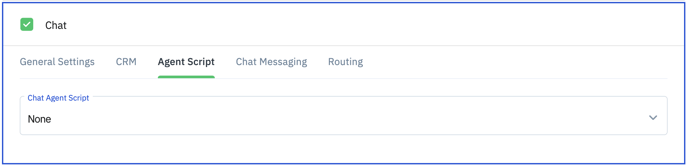
Agent Script
Deploy Chat Agent Scripts, select the respective script from the dropdown menu.
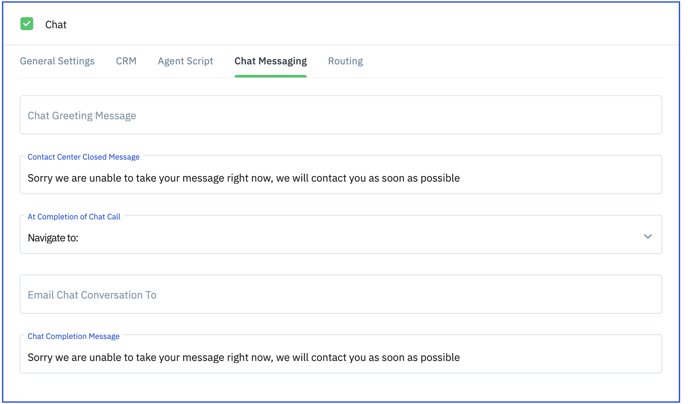
- Chat Greeting Message- Type the desired chat greeting message.
- Contact Center Closed Message- Type the desired message customers receive when interacting with your chat tool during closures.
- Email Conversation To- Choose a recipient to receive chat transcripts, via email, once a chat conversation has wrapped.
- Chat Completion Message- Type the desired chat completion message.
Routing
Configure the routing rules around your chat tool experience.
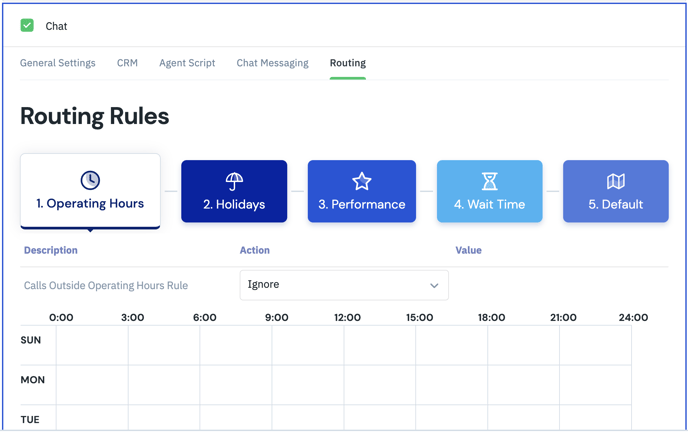
Operating Hours
Operating hours can be set to indicate when the call center will be open to take chats and other media.
Set the ‘Call Outside Operating Hours Rule’ if you'd like to divert the chat elsewhere after hours. Set the ‘Action and 'Value’ fields to determine where chats will be routed off-hours. Actions can route the chat to another menu, or simply end the chat.
New Operating Hours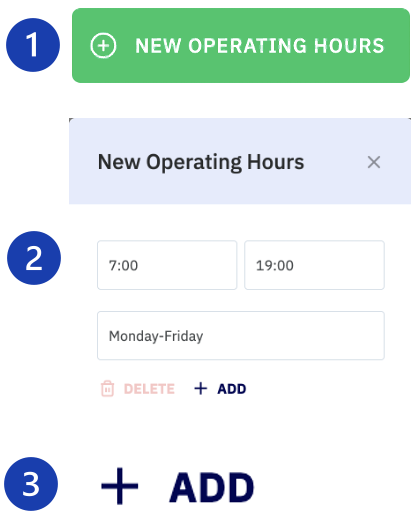
- Select the ‘Operating Hours’ tab, Click the green + ‘NEW OPERATING HOURS’
- Select the time and days your chat tool will be operational. (Please enter time as HH:MM in 24-hour format). Each day can be clicked upon to set the hours for that day, or the hours can be set for all days, or just Monday-Friday.
- To confirm the new hours of operation to the schedule click on the ‘+ADD’ icon.
Holidays
A holiday can be created to override the regularly scheduled routing.
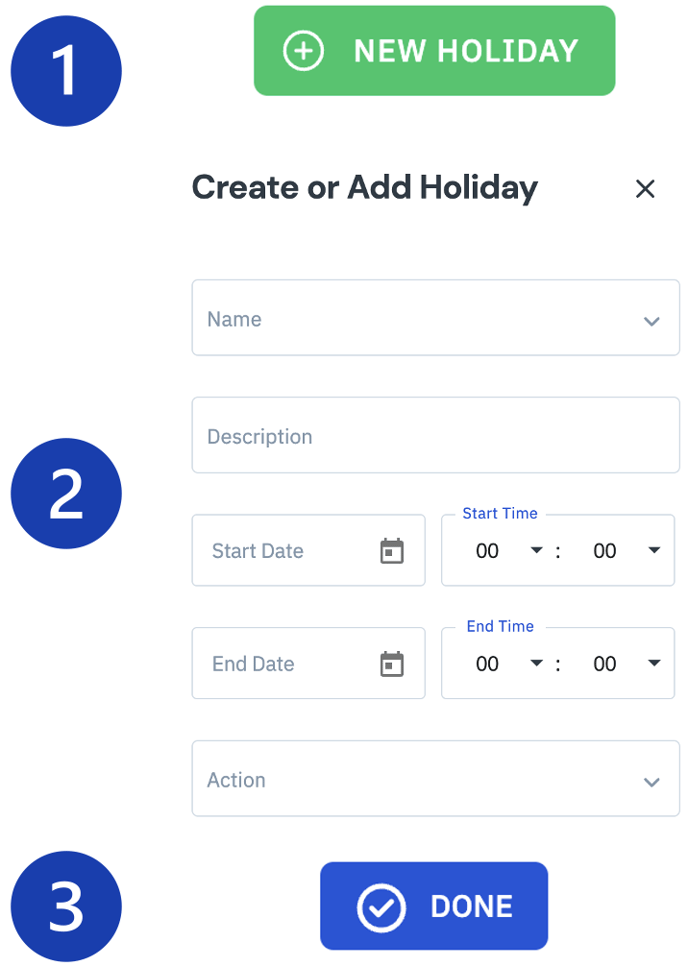
- Click on the ‘Holidays’ tab then click ‘New Holiday’. The ‘Create or Add Holiday’ screen will populate.
- Fill out the fields to give the holiday a name and select the date and time you’d like the holiday to begin and end. Additionally, you can select the action to take place when chats/media are received during this holiday.
- When finished creating the new holiday click ‘DONE’.
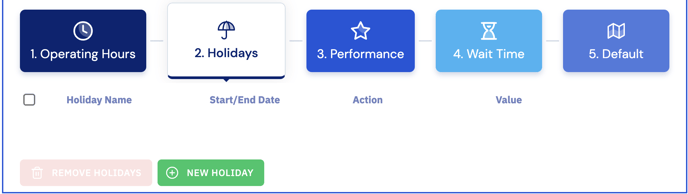
Performance
The Performance section allows chats/media to be re-routed if certain thresholds are breached.
- Click the ‘Performance’ tab.
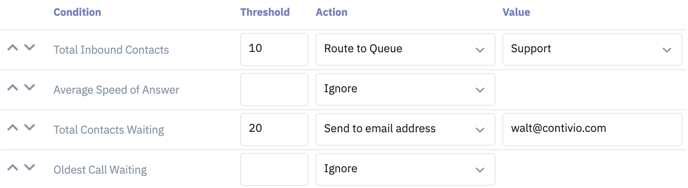
- Set a ‘Threshold’ for Total Inbound Contacts, Average Speed of Answer, Total Contacts Waiting, and Oldest Call Waiting.
- Set an ‘Action’ for a ‘Condition’, and a ‘Value’ if applicable.
Wait Time
Similar to the Performance section, calls can be re-routed if they remain in the queue for a set period of time.
- Click the ‘Wait Time’ tab.
- Set a ‘Threshold’ for the maximum wait time in seconds.
- Set an ‘Action’, and a ‘Value’ if applicable.

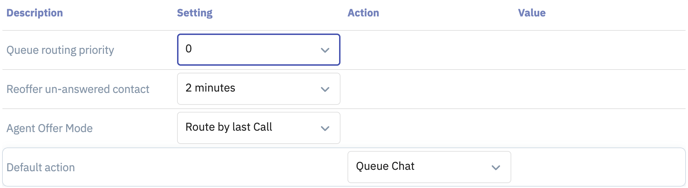
Default
In the Default section, normal call center behaviors can be set, including the default action when a chat is received.
- Click the ‘Default’ tab.
- Set a value for the Queue Routing Priority, Reoffer Unanswered Contact, and/or Agent Offer Mode.
- Set an ‘Action’, and a ‘Value’ if applicable.
Configure Live Chat
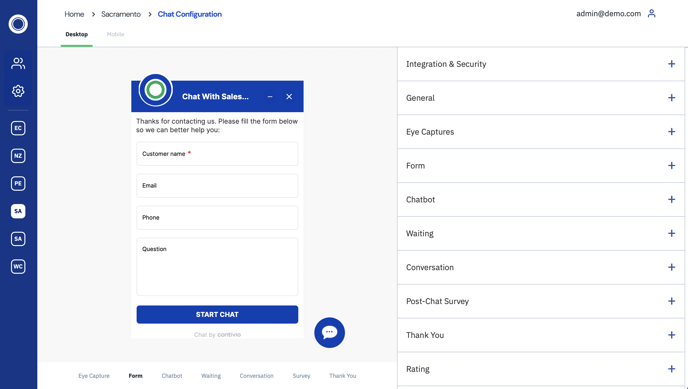
To configure your live chat interface you will need to log into the Contivio Admin Portal. Click on your Call Center > Chat Configuration.
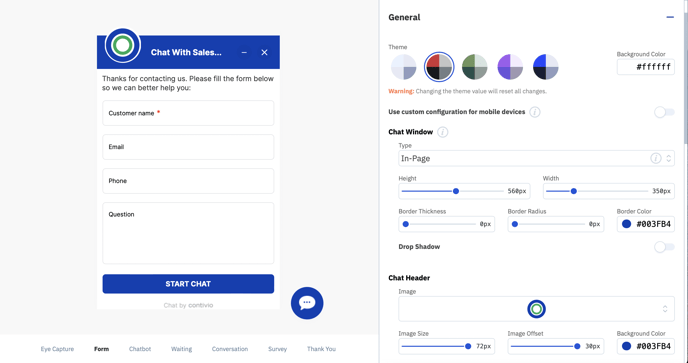
Below is the Live Chat Configurator home page where the entire look and feel can be owned from your side by modifying logos, color schemes, and messaging.
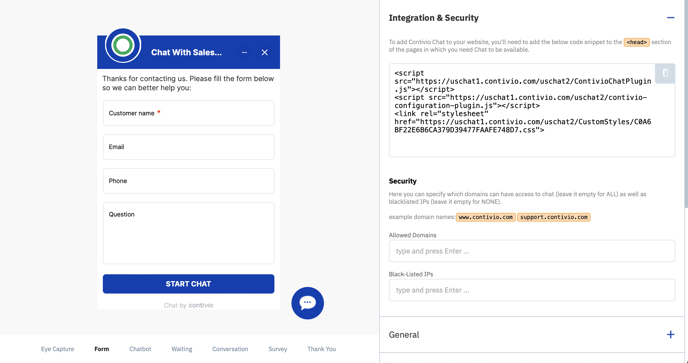
Integration & Security
There are only 8 lines of javascript needed to get your Live Chat Interface up and running. Any modifications made in the Contivio Admin Portal will take effect on your website in real-time.
General
Click the 'General' tab to modify color schemes, logos, and messaging.
Utilize our mobile chat configurator where you can change chat interface to better fit a mobile environment.
Default Language (Provide a chat window in multiple languages)
 You can set a chat window to be displayed in any of the six pre-translated languages. There is no need to create multiple chat windows for multiple languages.
This feature is part of the chat window setup. A chat window controls the look and feel and advanced behavior of the interface that is opened when a customer clicks an associated button or link. Multi-language set-up for chat windows is part of the configuring process within the Contivio Admin Portal.
Create or edit a chat window, as follows:
-
In the Contivio Admin Portal, go to your Call Center > Chat Configuration
-
At the top of the screen click on the language selection icon
 and select the desired language.
 -
In the Configuration tabs located on the right-hand side, complete each section where the corresponding flag of the country is visible (e.g., Header Text, Form Field Text, etc.).
You will need to complete these steps for each language you wish to support (in that specific language).
-
Your chat form will default to English unless specified otherwise (per page) using a default language override (e.g., <body contivio-lang=".fr">)
Example: For example, if English is your default language, a customer from France sees the chat window in English unless otherwise coded in the site.
-
Remember: Contivio provides our chat form in the following languages: English (en-US), French (fr-FR), German (de-DE), Italian (it-IT), Spanish (es-ES), and Portuguese (pt-PT).
-
Save your changes.
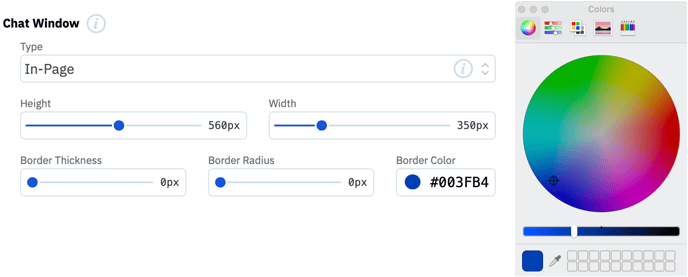
Chat Window
- Type- Select where a chat populates.
The 'In-Page' option opens the chat in a popup in the same browser tab. The 'New Window' option opens the chat in a new browser window. - Height & Width- Select the height and width of your chat interface in relation to your website with click and drag sliders.
- Border Thickness, Radius, Color- Click and drag to select border thickness and radius. Select a border color through a color pallet or use the eyedropper to match colors exactly.
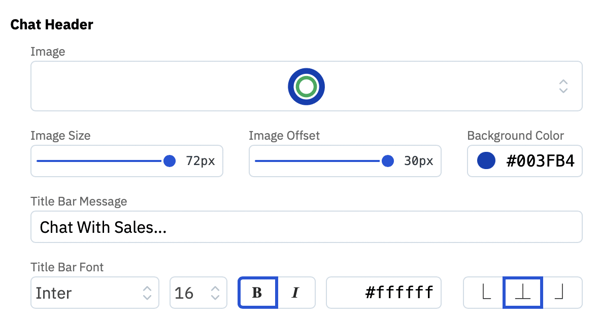
Chat Header
- Image- Select from pre-populated images or upload a custom image via a URL link.
- Image Size & Offset- Select the size and position of your logo with click-and-drag sliders.
- Background Color- Select the chat header background color through a color pallet or use the eyedropper to match colors exactly.
- Title Bar Message- Click into the field and type desired message.
- Title Bar Font- Select the font, size, color, and alignment of your messaging.
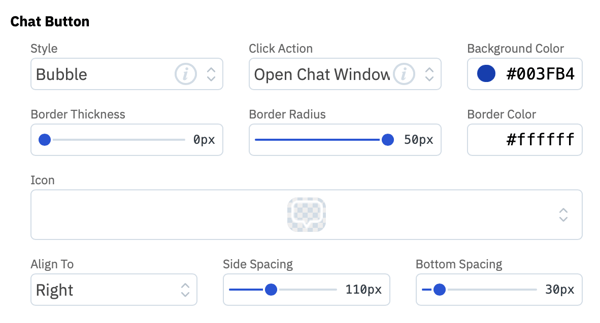
Chat Button
- Style- Select either the bubble or bar chat button.
- Click Action- Select to 'Open Chat Window' or 'Display Last Eye Capture' when the Chat Button is clicked.
- Background Color- Select the chat button background color through a color pallet or use the eyedropper to match colors exactly.
- Border Thickness & Radius- Select the thickness and radius of the chat button with click-and-drag sliders.
- Border Color- Select the chat button border color through a color pallet or use the eyedropper to match colors exactly.
- Icon- Select the chat button icon through the drop-down list.
- Alight To- Select chat button alignment in relation to the chat form.
- Side & Bottom Spacing- Select the horizontal and vertical position of your chat button, in relation to your website, with click and drag sliders.
You have to ability to disable the Chat Button when your Call Center is unavailable.

Chat Settings
- Pre Queuing CTI - Run CRM query to retrieve self-service data (e.g., Order Status Update).
- Collect and Submit Data (No Chat)- When enabled, the bot will collect data from the user, but no call will be queued to the agent.
Eye Captures
Click on the 'Eye Captures' tab to configure screen pop engagement forms.
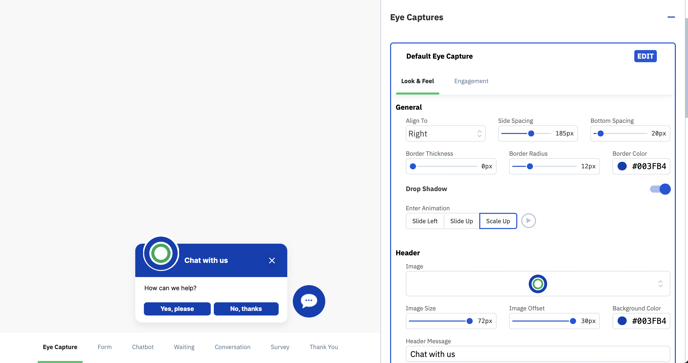
Look & Feel
General
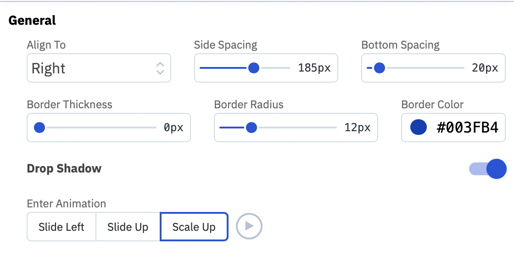
- Align To- Select if the eye capture form aligns with the left or right side of your website page.
- Side & Bottom Spacing- Select the horizontal and vertical position of your eye capture form, in relation to your website, with click and drag sliders.
- Border Thickness & Radius- Select the thickness and radius of the eye capture form with click-and-drag sliders.
- Enter Animation- Choose the desired animation for the eye-capture engagement.
Header
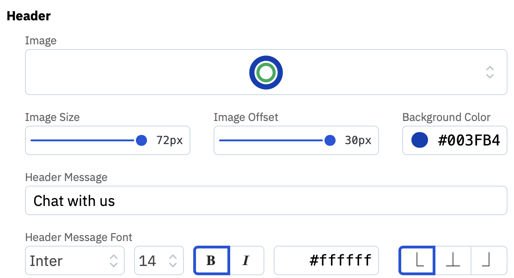
- Image- Select from pre-populated images or upload a custom image via a URL link.
- Header Message- Click into the field and type desired message.
- Header Message Font- Select the font, size, color, and the alignment of your messaging.
Engagement
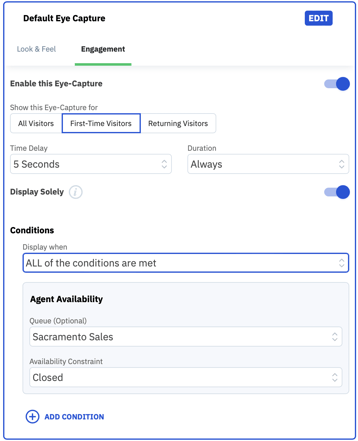
- Show This Eye-Capture For- You can deploy eye captures driven by engagement for all, first-time, and returning visitors to certain pages of your website.
- Time Delay- Select the time delay between someone opening your website and the eye capture form being presented.
- Conditions- Eye capture engagement can be driven by things like agent availability and your hours of operation.
Form
Click on 'Form' to update the fields and text that your customers will see on your chat form. You have the ability to pick and choose which fields are mandatory items.
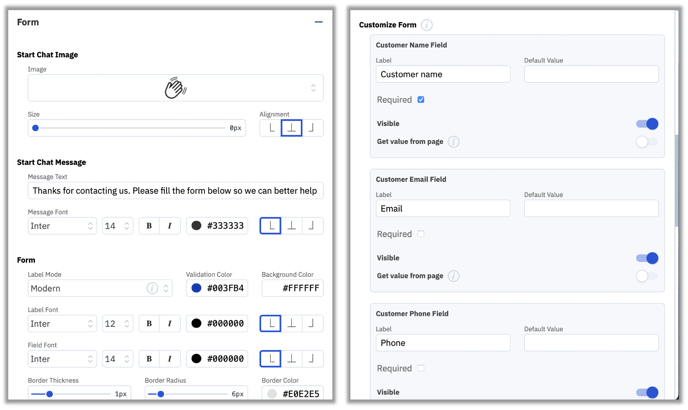
Start Chat Message
- Message Text- Click into field and type desired message.
- Message Font- Select the font, size, color and the alignment of your messaging.
Form
- Validation & Background Color- Select colors through a color pallet or use the eyedropper to match colors exactly.
- Label & Field Font- Select the font, size, color and alignment.
- Border Thickness, Radius & Color - Click and drag to select border thickness and radius. Select border color through a color pallet or use the eyedropper to match colors exactly.
Customize Form
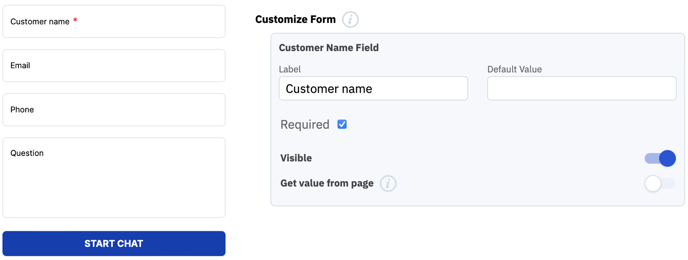
- Field- Create fields that will be in your chat form such as name, email, phone, and question. Pick and choose which fields will be mandatory.
Mandatory fields are shown with a red asterisk.
Start Chat Button
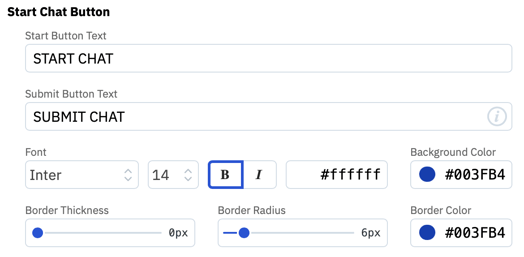
- Start & Submit Chat Button Text- click into the field and type the desired text.
- Font- Select the font, size, color, and the alignment of your text.
- Border Thickness, Radius & Color - Click and drag to select border thickness and radius. Select a border color through a color pallet or use the eyedropper to match colors exactly.
Chatbot
Click the 'Chatbot' tab to build out capabilities around chatbot experiences between you and your customers.
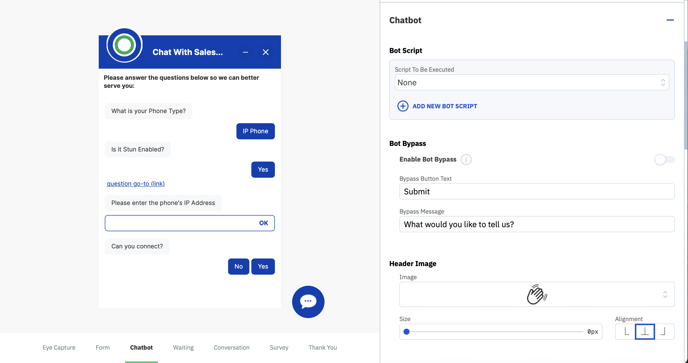
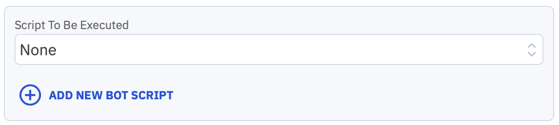
Bot Script
Easily build out yes/no logic trees all with the click of a mouse.
1. Click 'ADD NEW BOT SCRIPT'
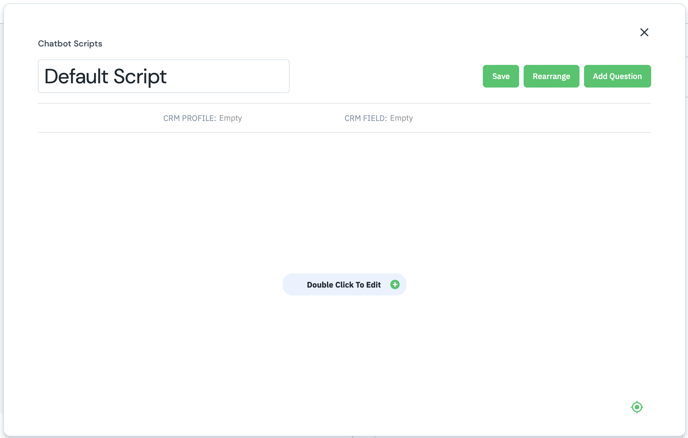
3. Double-click and type directly in each field on the left-hand side or use the dropdown/fields on the right to build out the yes/no logic tree. Click save when the desired script and flow are complete.

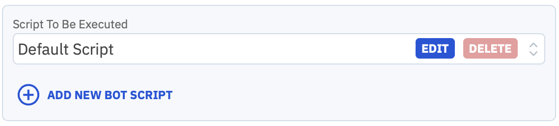
4. Click on the desired script from the dropdown list to enable the script.
Bot & Customer Message Styles
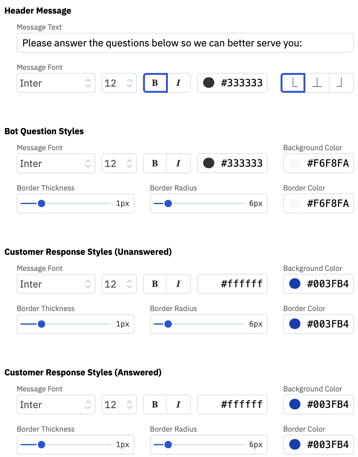
- Font- Select the font, size, and color of both the chatbot questions and customer responses.
- Border Thickness, Radius & Color - Click and drag to select border thickness and radius. Select border color through a color pallet or use the eyedropper to match colors exactly.
- Header Message- Click in the field and type desired message. (i.e. Please answer the questions below so we can better serve you.)
Waiting
Configure the waiting screen that customers will see when engaging with your live chat interface.
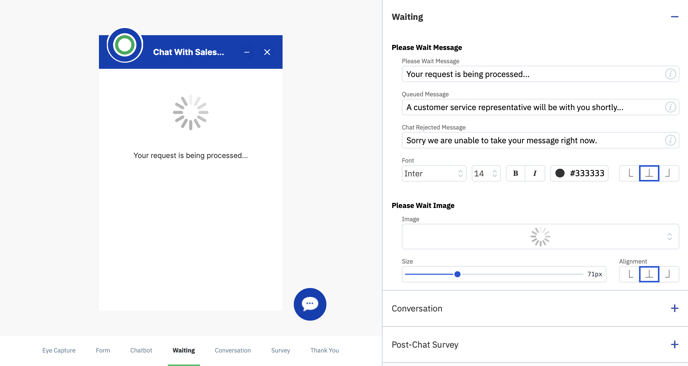
Please Wait Message
- Please Wait, Queued, and Chat Rejected Message- Click into to field and type desired messaging.
- Font- Select the font, size, color, and alignment.
- Please Wait Image- Select the size, alignment, and image that will be presented to customers while the chat is loading.
Conversation
Customize the conversation form. The Conversation form is what the customer sees when chatting with an agent.
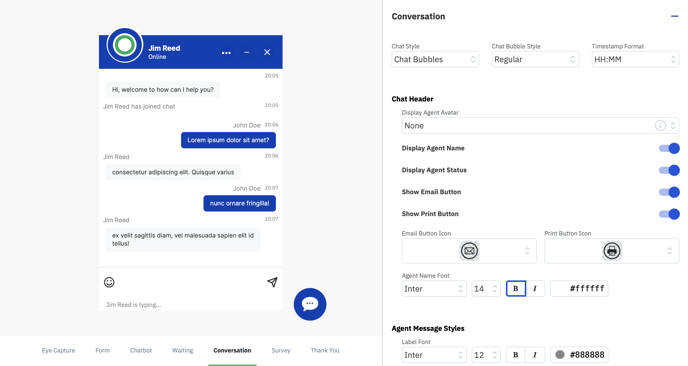
- Chat & Bubble Style- Customize the chat and bubble aesthetic with easy-to-use drop-down menus.
- Timestamp Format- Choose the timestamp format shown in the conversation thread. (i.e. HH:MM, HH:MM:SS) The timestamp can also be hidden.
Chat Header
-
Display Agent Avatar- Choose to display a photograph, logo, or the initials of the agent the customer is chatting with. Or choose to display nothing. (This will be configured during the initial setup of each user/admin in the "People"
 section of the portal)
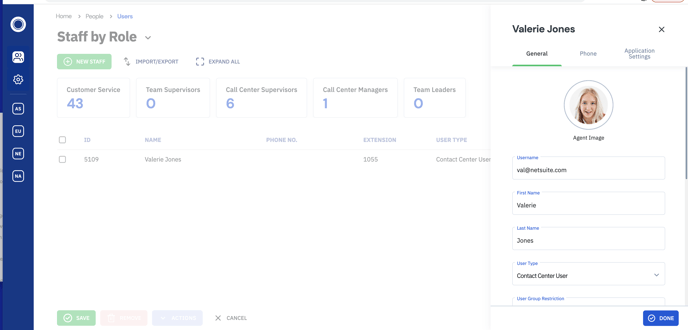
-
Display Agent Name & Status- Display the agent's name and online status.
Agent & Customer Message Styles
- Font- Select the font, size, color and the alignment of your text.
- Border Thickness, Radius & Color - Click and drag to select border thickness and radius. Select border color through a color pallet or use the eyedropper to match colors exactly.
- Greeting Message- Greeting message that is shown at the beginning of the chat thread. Click in the field and type desired message.
Notifications
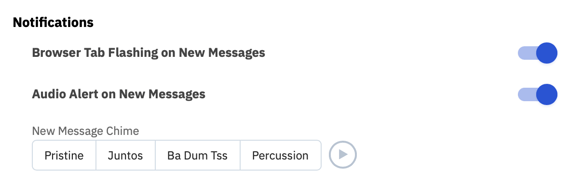
Fully configure how customers will receive notifications when chatting with agents.
Post-Chat Survey
Drive post-chat surveys with customers to collect important information after a chat conversation has wrapped. 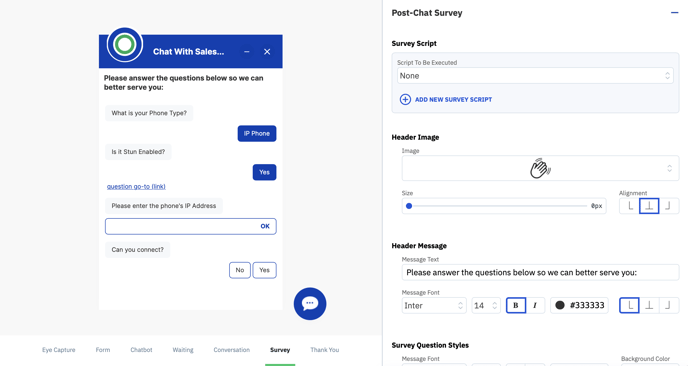
- Header Message- Message that is shown at the beginning of the chat survey. Click in the field and type desired message.
- Font- Select the font, size, color, and the alignment of your text.
- Border Thickness, Radius & Color - Click and drag to select border thickness and radius of the text bubble. Select border color through a color pallet or use the eyedropper to match colors exactly.
Survey Question & Customer Response Styles
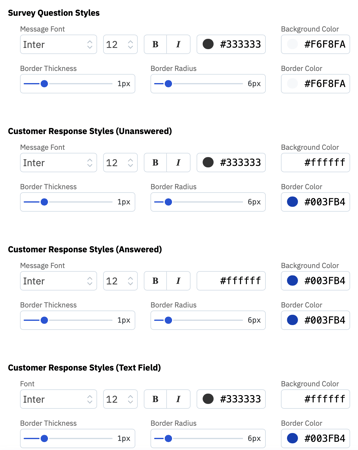
- Font- Select the font, size, and color of both survey questions and customer responses
- Border Thickness, Radius & Color - Click and drag to select border thickness and radius of the text bubble. Select border color through a color pallet or use the eyedropper to match colors exactly.
Thank You Message & Rating
Drive the messaging and esthetics of your post-chat thank you message and rating system.
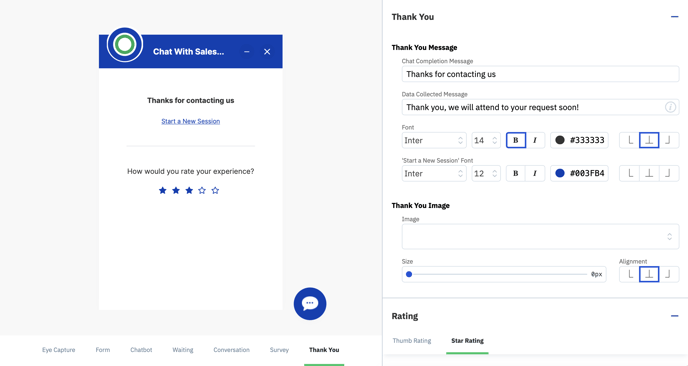
Thank You Message
- Chat Completion Message- Click in the field and type desired post-chat completion messaging. (i.e. Thanks for chatting with us.) Select the font, size, color, and the alignment of your text.
Rating
- Rating Message- Choose between a 'Thumbs up Thumbs down' or traditional Star Rating system. Click in the field and type desired rating message. (i.e. How would you rate your experience?) Select the font, size, color, and the alignment of your text.
- Star Colors- Configure the color and esthetic of the star rating.
- Thumbs Up, Thumbs Down- Choose the image used for your Thumb rating.